
One game is a waste of an industrial controller
The beer game cabinet from Part 1 now runs happily next to the desk. But watching a machine run that well starts to feel wasteful. An industrial controller, a touch panel, a real physical lever - and exactly one game? Hardware like that should be running an arcade, not a single cabinet.
Around then we had been enjoying videos of streamers playing Gamble With Your Friends, the game where friends share one bank account and pay off a debt through casino games. Of the several games inside it, the one that stood out was blackjack - the dealer, you, and a staring contest toward 21. “We could do that on our cabinet,” we thought.
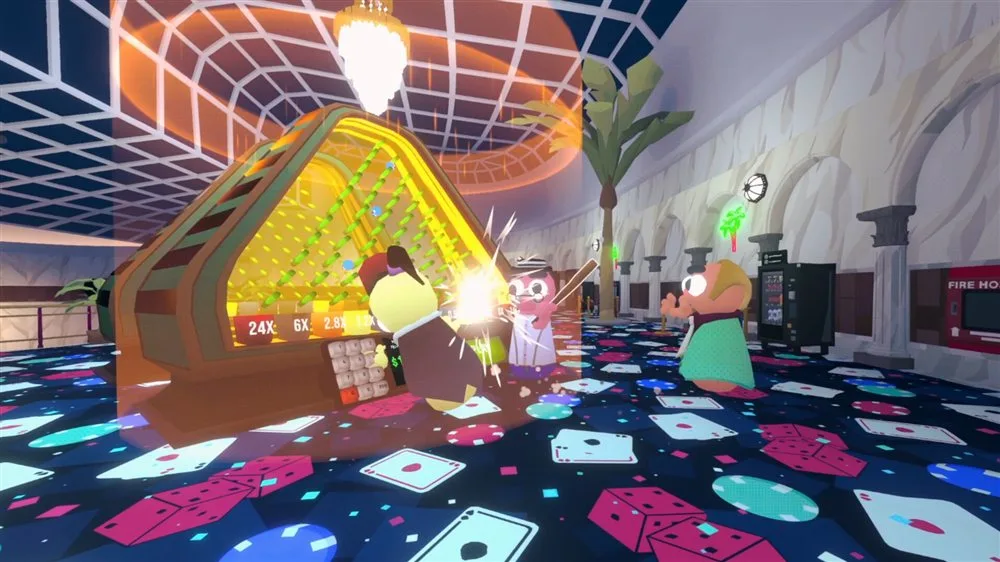
Gamble With Your Friends, the game that inspired this. Friends share a single bank account and work off a debt through a set of casino games, and blackjack was the one that became the starting point for this project. © TEAM GWYF / TENSTACK · Steam
So we converted the title screen into a game select menu and plugged blackjack in as the second game. The logo changed from “BEER POUR GAME” to “ARCADE GAME”. Beer is now one game among several, and the expensive hardware feels a little less wasted.
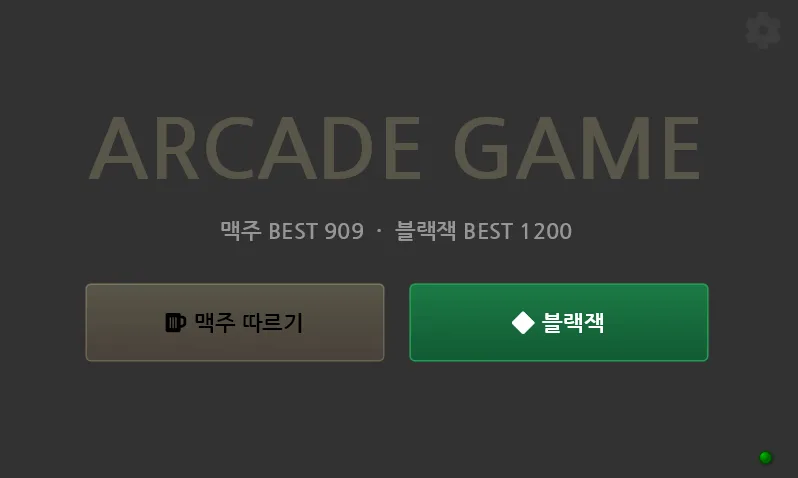
The logo became “ARCADE GAME” and the title became a game select menu. You now choose between beer pouring and blackjack. The top shows each game’s high score (beer BEST 909 · blackjack BEST 1200).
4 physical buttons, 4 IO expansion board inputs
Physical buttons, not touch, were what we wanted driving blackjack. Agonizing over hit or stay and then slapping a button is a feeling a touchscreen cannot produce.
Counting the buttons we needed came to four: PLAY (deal) / HIT / STAY / DOUBLE. And the IO expansion board already bolted to the cabinet has exactly four inputs. The input terminals on the board we added in Part 1 for lamp outputs had been sitting idle the whole time. No new board, four wires, done. Coincidences like that feel good.
The screen indicates which button is live. During betting, only the PLAY chip lights up in its color; on your turn, only HIT/STAY/DOUBLE do. The screen does the job of illuminated buttons.
Before the arcade buttons we ordered arrived, we temporarily wired four tact switches to verify the input logic first.
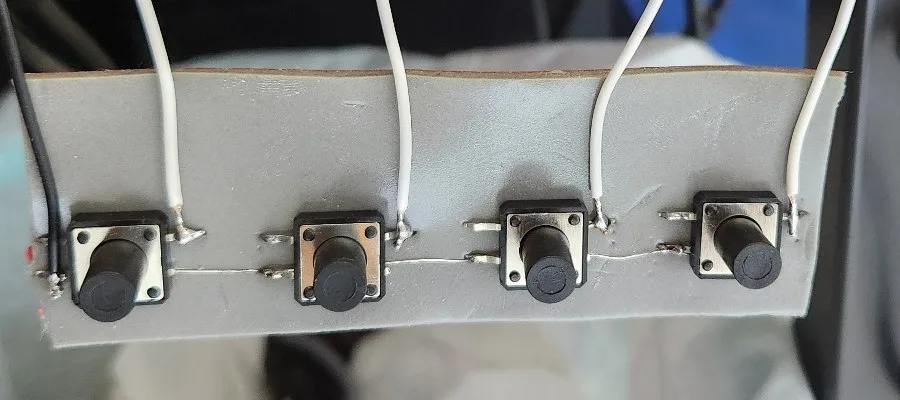
Before the real arcade buttons arrived, four tact switches went onto a temporary panel and into the four inputs on the IO expansion board. Four wires bring in play, hit, stay, and double.
The second game took half the time by reusing PLC logic
We kept the rule established with the first game: the PLC owns the logic, the HMI only handles presentation. Shuffling, whether an ace counts as 1 or 11, where the dealer stands, chip settlement - all of it lives inside the controller. The screen receives those values and draws cards.
The payoff for that structure arrived with the second game. The leaderboard, the initials keypad, the settings popup, the communication layer - all reused from the beer game as-is. The only new work was blackjack logic and the table screen. If the first game took a day, the second one felt like half of that.
One detail. The dealer’s face-down card is not even put on the wire until it is revealed (value 0). Peeking into controller memory will not tell you the hole card. Even for a game cabinet, a single source of truth for the verdict has to be respected.
Blackjack rules, tuned for an arcade
Blackjack rules transplanted straight across from a casino are not fun. The customer for this machine is someone standing up and playing for five minutes.
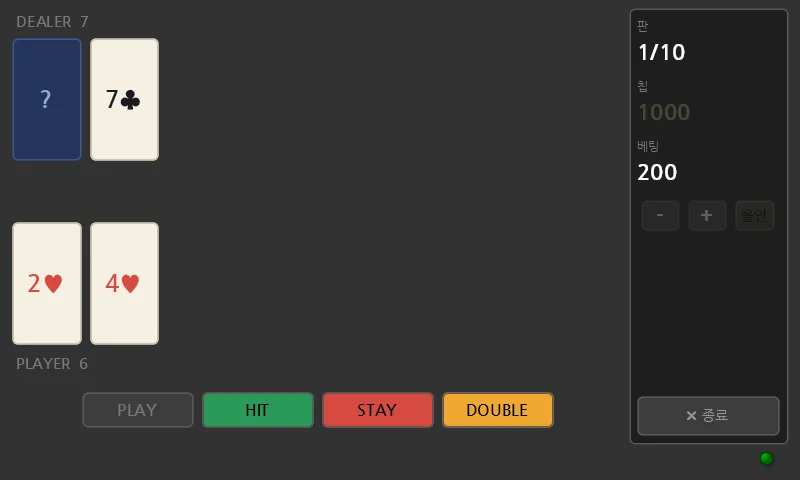
The actual blackjack screen. The dealer shows 7♣ plus one face-down card (?), and we hold 2♥ and 4♥ for 6. Round (1/10), chips, and betting on the right; PLAY, HIT, STAY, and DOUBLE below. The cards are not images, they are drawn in code - more on that below.
- Start with 1,000 chips, play 10 rounds. Your chip count at the end is your score, and the biggest winner carves their initials into the hall of fame. Go bust and it ends right there.
- Betting in units of 100, with an all-in button. A last-round all-in comeback is the highlight of this game.
- Double down is standard - double the bet and take exactly one more card.
- And one rule we twisted.
Alternating deal - if I take a card, so does the dealer
In normal blackjack the dealer draws their whole hand after you finish. Getting all the results at once is dull on an arcade machine. So we added a house rule where the dealer takes a card every time you hit (only while the dealer total is under 17).
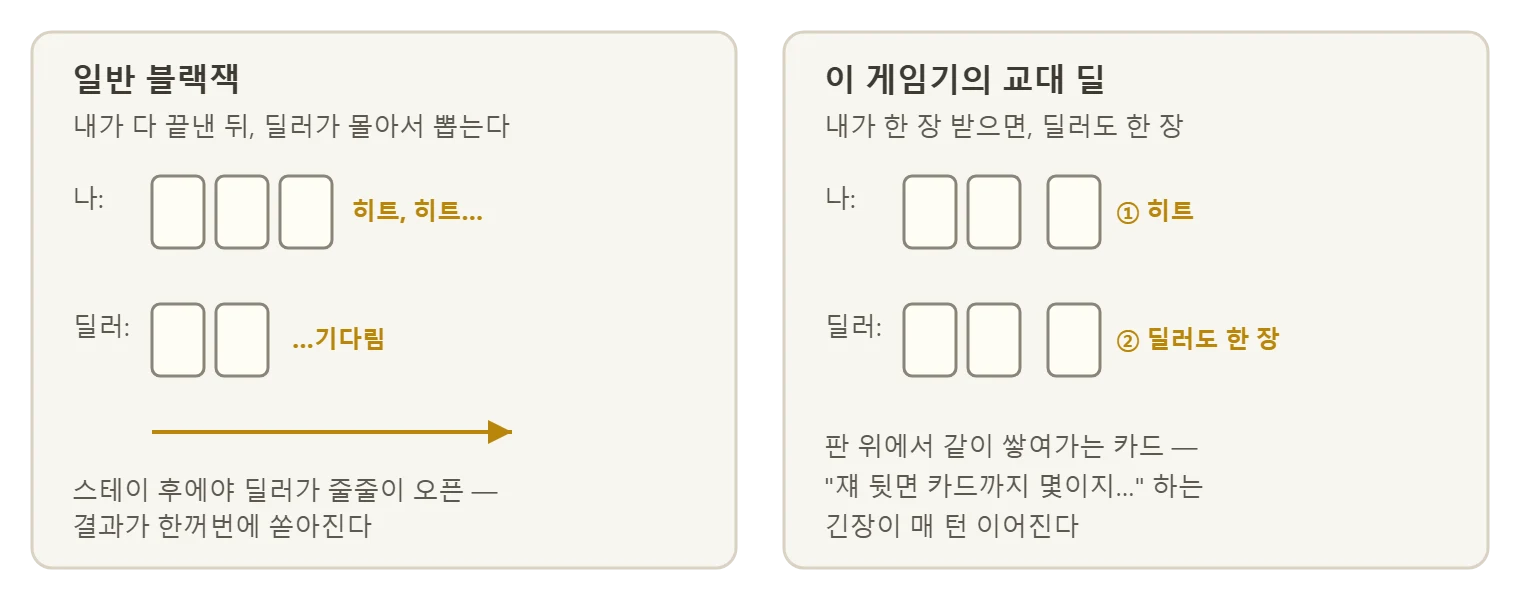
Every time your hand grows, face-up cards pile up on the dealer’s side too. The one face-down card stays hidden to the end, so the arithmetic runs every turn: “That is already 14 showing, and with the hole card…” The hit button suddenly gets heavy.
How to render 52 cards in code instead of images
The 52 playing cards were the thing we worried about most on the screen. The prospect of producing that many card images was daunting, and in the end we drew none of them. Cards are rendered in code as white rounded rectangles with a rank and a suit character on top. Zero minutes of asset production, and crisp at any resolution.
It was not free, of course. Three small incidents:
- The invisible ink incident - the cards drew, but the text did not appear. We had misread the alpha slot in the color code and were painting the text at 13% opacity. Transparent text on a white card is perfect camouflage.
- The diamonds broke - ♠, ♥, and ♣ were fine, but only diamonds came out as a box. The Korean font we were using did not include the playing-card diamond character (♦). Switching to the geometric shape ◆ fixed it. Only the font knows which characters a font contains.
- The dealer went on strike - we pressed stay, the dealer flipped the hole card and froze. The culprit was that PLC classic, scan order. The timer producing the 0.5 second pulse for the dealer’s card animation sat ahead of the logic that counts the pulse, so at the moment it completed it was clearing its own pulse first. Swapping the order of the two rungs fixed it - a bug fixed by moving a position without editing a single line of code is a delicacy you only get in PLC work.
Settlement shows as a color badge. WIN is green, LOSE and BUST are red, BLACKJACK! is amber, and PUSH is gray - big enough between the cards that you can read the outcome over someone’s shoulder at a bar.
A 3D-printed button enclosure - and this time we edited the design with a pen
Four tact switches out of the parts bin, soldered to a board, were the temporary buttons. They worked, but poking a switch the size of a fingernail is nothing like “playing blackjack.” So, as with the lever in Part 2, we designed a 3D-printed button enclosure in Blender.
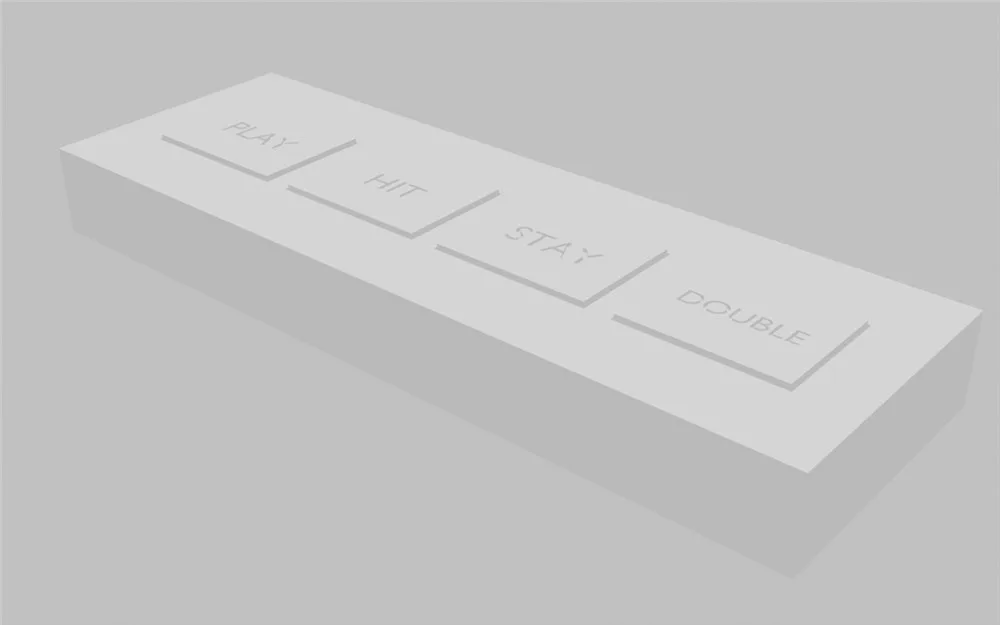
The structure is stolen from mechanical keyboards. A large rectangular cap (32×24mm) has a round socket on its underside, so it slips onto the switch plunger like a keycap. There is no spring - a retention flange holds the cap and the switch’s own return force does the rest. PLAY, HIT, STAY, and DOUBLE are engraved into the cap tops. Because the caps are rectangular they cannot rotate, so the labels always read straight.
The fun part of this design was how we revised it. We had forgotten a channel for the common (COM) wiring that links the switches, and instead of explaining it in words, this time we scribbled on the 3D model with an annotation pen. The AI read the coordinates of those pen marks and cut wiring channels at exactly those three spots. It feels exactly like drawing in red pen on a drawing.
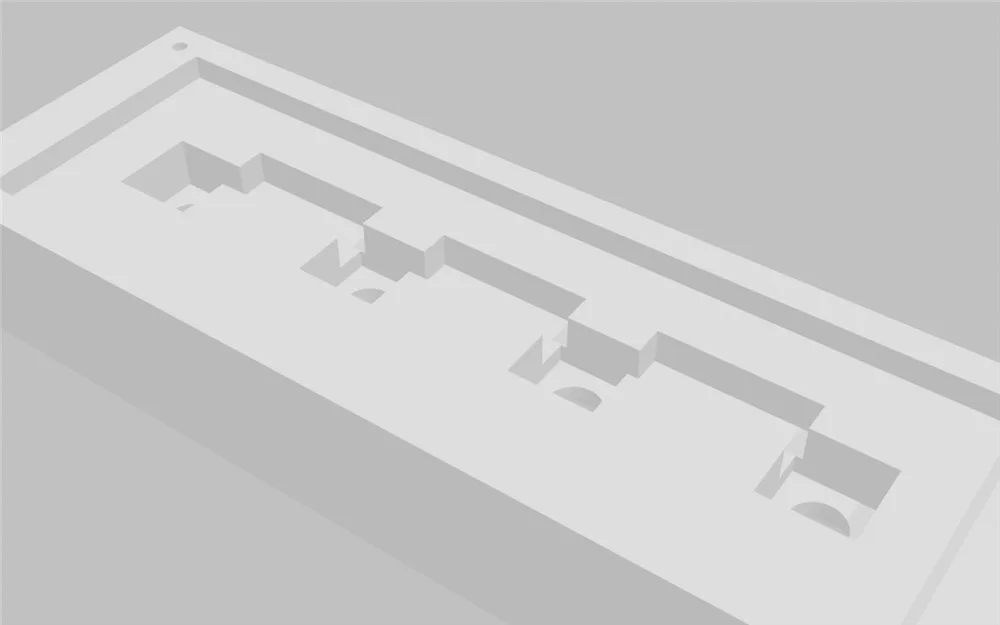
The lesson from Part 2 repeated itself as well. The design we estimated before checking the switch datasheet had the plunger height off by 3mm - printed as-is, the caps would have held the switches permanently pressed. Ask the part (or its datasheet) for the part’s dimensions. Finally, cutting the cap’s socket deeper so it swallows the plunger trimmed over 7mm off the enclosure height compared to the first design.
What is left: the cabinet became a platform
The button enclosure, once printed and fitted, will finally let the guide chips on screen and the buttons under your fingers meet properly. That is the next chapter of this series (along with a rematch for the vibrating lever that failed in Part 2).
Building the first game, the sentence was “we built a game cabinet.” After plugging in the second game, the sentence changes. “We have a game platform.” What should the third game be, when the buttons and the lever are already there?
Because the PLC owns the logic, the leaderboard and the communication layer carried straight over, and one cabinet became a game platform.
Coming in Part 4: bringing the screen to life, and the day one AI outsourced the artwork to another AI.
Earlier chapters: Part 1 turned a crank into a real lever, and Part 2 covered machining the lever and the failed haptics transplant.
Contact
- Email: [email protected]
- Instagram: https://www.instagram.com/going.sen/
- Website: https://intosen.com/kr/consult/
Comments
Enter a nickname to leave a comment, or sign in with Google or GitHub.